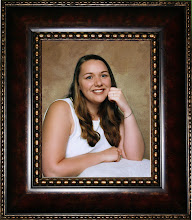
In an earlier post, I showed you the Photoshopped mock-ups I made for the kids to approve their bedroom designs. Here's how my daughter's room turned out:
The carpet was originally blue. We dyed it purple. Thank goodness I only needed to paint half the wall, because that pink took at least 5 coats! That's what I get for buying cheap paint.
We installed the wainscott and trim, painted glossy white. The headboard was painted in the same glossy white. I installed the girly chandelier and swapped out her closet doors for mirrored ones.
She loves her new room and calls this her princess bed. <3
My son's room:
He'd begged for bunkbeds and I couldn't resist. His room has the same wainscot as my daughter's room, but the trim is stained instead of painted. I love how that looks with the deep blue paint.
I apologize for the sparse number of pictures. (Running out of storage in Picasa.) To see more, come visit!
Wednesday, August 18, 2010
Tuesday, April 20, 2010
Friday, February 26, 2010
Stalking Geese
I love the fields of geese near our home here in MD. I kept passing by them without my camera (or even cameraphone!) . I finally remembered to put my camera in the car and realized that I am officially stalking the geese. Here's a pic I took today:
Labels:
Photography
Thursday, February 25, 2010
Monday, February 22, 2010
Photoshop Actions
I got PSE8 for my birthday and have finally installed some actions. Here's how they work: You find them online and download them into Photoshop. Then they appear in your styles and effects palette. They save a ton of time! For example, say I'm starting with this photo:
I love those baby blues, but the bright red shirt is distracting. I can try "Selective Color" and it runs automatically, creating layers with layer masks, etc. Then I can just paint where I want to see color and get this:
I can also change the color of just the shirt by selecting with the magic wand and desaturating:
They have actions for creating vignettes, retouching portraits, selective color, making pics look antique, etc.
Have fun!
Labels:
Photography
Thursday, February 18, 2010
Prepping photos for framing
I wanted to frame my kids' recent school photos in the 4x6 frames I'd recently bought. Here's the original pic of my son:
The problem was that they weren't the right proportion and I didn't want to crop them. To solve the problem, I stole a page from the digital scrapbooking book. I opened a 4x6 document in Photoshop and covered it with a patterned digital scrapbooking paper. Then, I plopped the photo down on top of it.
I adjusted the saturation and lightness until my (originally green) paper matched the gray background. Then, with a soft brush set at 22% opacity, I erased the background to allow the pattern to show through. Here's the finished result:
The original picture of my daughter:
And the 4x6 version:
Labels:
Decorating,
Photography
Wednesday, February 17, 2010
Framed!
For some reason, decorating relieves stress for me. That creates a bit of a conundrum because during this stressful time I'm living in someone else's home! Fortunately, my mother-in-law has been very gracious.
Color Theory: In the aftermath of Hurricane Andrew, everybody painted their living room walls mauve. It is said that mauve relieves insanity. It is a color often used in prisons and hospitals for similar reasons.
To ward off depression during my hubby's deployment, I painted my room (AKA the guest bedroom) bright green. I hung gorgeous white curtains and bought a white duvet cover set that I have plans for....
Then I played musical frames. I started with these:
I bought two 4x6 frames in a similar ornate dark wood. I then added pics of the kids (more on that soon):
Color Theory: In the aftermath of Hurricane Andrew, everybody painted their living room walls mauve. It is said that mauve relieves insanity. It is a color often used in prisons and hospitals for similar reasons.
To ward off depression during my hubby's deployment, I painted my room (AKA the guest bedroom) bright green. I hung gorgeous white curtains and bought a white duvet cover set that I have plans for....
Then I played musical frames. I started with these:
After a quick swap, we have:
I like the way it's turning out. What are you working on?
Labels:
Decorating
Thursday, December 17, 2009
Clipping Masks
I've just begun experimenting with clipping masks. What's that, you ask? Here's an example of a clipping mask I found online:
You can use this technique with any shape your heart desires!
Here's a random clipart image I had on my computer:
What do you think?
You stick in in Photoshop and "clip" a photo or paper to it. The results look like this:
Here's a random clipart image I had on my computer:
Here it is after clipping some digital papers to it:
Labels:
Scrapbooking
Monday, December 7, 2009
Day 1
My husband hasn't even been gone for 24 hours. He helped put the kids to sleep last night before he left. It lasted for about two hours before the first alarm went off.
Literally.
The smoke alarms decided to start chirping at 10 minute intervals. I'd get up and take one down, wait 10 minutes, and take another one down until the chirping was silenced. For a small house, there were a lot of smoke detector options.
Last night, I also went deaf in my left ear. The ear hurts and I had trouble getting any sleep for the rest of the night. This morning, I got the kids dressed and off to school, got myself to the clinic, and waited for prescriptions for sudafed and zyrtec.
I then took myself to a dentist appointment where he numbed half my face and my neck and tongue.
I'd just fallen asleep for a nap when the phone rang.
I realized I hadn't eaten anything today and made blueberry muffins.
I picked up the kids, sold their plastic playhouse, made peanut butter and jelly sandwiches, and got the kids in the tub. While they played in the water, I tried an internet remedy for my ear- it didn't work. They took the opportunity to splash so much that (even with the shower curtain closed) they flooded the bathroom. I got them in pajamas and sent them to bed.
Not even 24 hours....
Literally.
The smoke alarms decided to start chirping at 10 minute intervals. I'd get up and take one down, wait 10 minutes, and take another one down until the chirping was silenced. For a small house, there were a lot of smoke detector options.
Last night, I also went deaf in my left ear. The ear hurts and I had trouble getting any sleep for the rest of the night. This morning, I got the kids dressed and off to school, got myself to the clinic, and waited for prescriptions for sudafed and zyrtec.
I then took myself to a dentist appointment where he numbed half my face and my neck and tongue.
I'd just fallen asleep for a nap when the phone rang.
I realized I hadn't eaten anything today and made blueberry muffins.
I picked up the kids, sold their plastic playhouse, made peanut butter and jelly sandwiches, and got the kids in the tub. While they played in the water, I tried an internet remedy for my ear- it didn't work. They took the opportunity to splash so much that (even with the shower curtain closed) they flooded the bathroom. I got them in pajamas and sent them to bed.
Not even 24 hours....
Wednesday, December 2, 2009
Edges
As long as I'm thinking about scrapbooking, allow me to share one of my favorite tips.
Sometimes, when you've cropped a photo and you put in on a background paper, the white edges stand out and detract from the picture. To eliminate the contrast, simply run a marker along the edges of the picture. Now you'll have a nice clean look.
Happy scrapping!
Sometimes, when you've cropped a photo and you put in on a background paper, the white edges stand out and detract from the picture. To eliminate the contrast, simply run a marker along the edges of the picture. Now you'll have a nice clean look.
Happy scrapping!
Labels:
Scrapbooking,
Tips
To store or not to store...
I am currently obsessively scrapbooking. I'm trying to finish any albums that could be stored instead of mailed to MD. I can store our wedding and honeymoon albums, the kids first year albums, and the Halloween album. If I can get it up to date, I can also store the Thanksgiving album. If I finish that I'll move on to the Disneyland album. I still have plenty to take with me, don't worry.
Last night, I also photoshopped the backgrounds of a bunch of the kids' school pictures. I used techniques I've already blogged about. I simply desaturated most of them, making a light gray background.
Just touching base. What are you working on?
Last night, I also photoshopped the backgrounds of a bunch of the kids' school pictures. I used techniques I've already blogged about. I simply desaturated most of them, making a light gray background.
Just touching base. What are you working on?
Monday, November 30, 2009
Father's Day 2009 page
Most of the friends who are leaving comments seem to be digital scrapbookers. Here's a digital page that I completed today:
It's not my favorite page, but it gets that album officially up to date! I used an 8.5x11" template, so it was super speedy. If you want more freedom with the printed books (from Shutterfly, etc.) you have the option of digiscrapping the pics using your own papers and templates, and them uploading them to Shutterfly as if they were full page photos. Have fun playing!
Labels:
Scrapbooking
Sunday, November 29, 2009
Album Organization
I'm happy to say that the Christmas album is up to date! I got the chance to scrapbook at church on Saturday and made a ton of progress! All the ladies were working on different aspects (sorting and organizing photos, cropping, journaling, etc.) and it got me thinking about my process.
Here's how I normally assemble an album:
1st: Take great pictures. If the picture isn't great, alter it and print a new one. For example, if the colors are horrible and clash, make it black and white (or sepia).
2nd: Choose which pics I want to scrapbook and put them in page protectors in the appropriate album.
3rd: Put a post-it note on the page protector with the date and any info I don't want to forget to journal.
4th: Go through and choose a background paper that enhances the photos. Slip that into the page protector with the pics.
5th: Sometimes I'll go through and put specific matching embellishments (or a coordinating paper) in the page protector.
Finally, I put the pages together.
How do you organize your efforts?
Here's how I normally assemble an album:
1st: Take great pictures. If the picture isn't great, alter it and print a new one. For example, if the colors are horrible and clash, make it black and white (or sepia).
2nd: Choose which pics I want to scrapbook and put them in page protectors in the appropriate album.
3rd: Put a post-it note on the page protector with the date and any info I don't want to forget to journal.
4th: Go through and choose a background paper that enhances the photos. Slip that into the page protector with the pics.
5th: Sometimes I'll go through and put specific matching embellishments (or a coordinating paper) in the page protector.
Finally, I put the pages together.
How do you organize your efforts?
Labels:
Scrapbooking
Wednesday, November 18, 2009
Flying Solo
My husband is off at another training, so I am single-parenting again this week. The last training gave birth to the posts about cleaning cracked eggs, etc. One night, I put them to bed, went to take a quick shower, and got out to find them playing in the fireplace!
Monday and Tuesday went as well as could be expected. I showered before picking them up from school to avoid a repeat of the soot episode. Yesterday, I even scored a ton of free boxes and packing materials!
This morning, however, I have a sick 4 year old home from school. Today's tip: frozen blackberries are a great way to cool down hot oatmeal.
Monday and Tuesday went as well as could be expected. I showered before picking them up from school to avoid a repeat of the soot episode. Yesterday, I even scored a ton of free boxes and packing materials!
This morning, however, I have a sick 4 year old home from school. Today's tip: frozen blackberries are a great way to cool down hot oatmeal.
Labels:
Tips
Sunday, November 15, 2009
Silver Bells....
I've been polishing the silver, and am reminded how little I enjoy that. I've also been worried about its fate while in storage.
They sell storage bags made from silver cloth for $15 each at Bed Bath & Beyond. I'd have to buy 4 of those plus a big one for the tray, etc.
Instead, I bought some silver cloth (available at JoAnn) and made my own! It's not difficult at all.
For the trays: Sew a pouch with extra length for a front flap. Attach ribbon to the front of the pouch and to the flap to secure.
For the hollowware (teapots, etc.): Make into drawstring bags, sized to fit.
You only need to be able to sew a straight line. Make the channel of the pouch first, then sew the side and bottom. I attached a diaper pin to the end of some satin ribbon to make threading it through the channel easier.
Voila!
They sell storage bags made from silver cloth for $15 each at Bed Bath & Beyond. I'd have to buy 4 of those plus a big one for the tray, etc.
Instead, I bought some silver cloth (available at JoAnn) and made my own! It's not difficult at all.
For the trays: Sew a pouch with extra length for a front flap. Attach ribbon to the front of the pouch and to the flap to secure.
For the hollowware (teapots, etc.): Make into drawstring bags, sized to fit.
You only need to be able to sew a straight line. Make the channel of the pouch first, then sew the side and bottom. I attached a diaper pin to the end of some satin ribbon to make threading it through the channel easier.
Voila!
Labels:
Tips
Thursday, November 12, 2009
Burned
I recently got a 2nd degree burn on my index finger. (Tip #1- Don't grab a hot burner.) Here's a tip for how to treat a minor burn:
First, hold a frozen cold pack to it (the kind you put in packed lunches). Make sure you don't go numb, as that could indicate frostbite. This will stop further injury and ease the swelling and pain.
Treat with Butt Paste:
My husband and I road-tested this stuff on our children. Surprisingly, it works better than the competitors that have more active ingredients in them. It works magic on terrible diaper rash, and can help grown-up healing, too.
First, hold a frozen cold pack to it (the kind you put in packed lunches). Make sure you don't go numb, as that could indicate frostbite. This will stop further injury and ease the swelling and pain.
Treat with Butt Paste:
The name is awful, but this stuff is magic! I slathered it on and covered with a super-cool Hello Kitty Band-Aid to keep it on overnight. It helped immensely! The burn didn't even blister (and I know it wanted to- I could see it coming).
My husband and I road-tested this stuff on our children. Surprisingly, it works better than the competitors that have more active ingredients in them. It works magic on terrible diaper rash, and can help grown-up healing, too.
Labels:
Tips
Sensitive Little Ears
We attend the "contemporary" service at our church. The band is amazing, but it's too loud for my son.
He would beg to stay in the nursery with my daughter, but that meant he missed the children's message. (He's the kid who always "says the darndest things" and we'd hate to miss out on that.) So we tried having him stay with us, but he'd end up hiding under the pews holding his ears, or begging to go back to the "cry room".
We tried regular headphones. They looked adorable, but didn't help the sound levels. I considered earmuffs. Then I came across these:
He would beg to stay in the nursery with my daughter, but that meant he missed the children's message. (He's the kid who always "says the darndest things" and we'd hate to miss out on that.) So we tried having him stay with us, but he'd end up hiding under the pews holding his ears, or begging to go back to the "cry room".
We tried regular headphones. They looked adorable, but didn't help the sound levels. I considered earmuffs. Then I came across these:
"Sound isolation headphones" meant for kids who play instruments (like the drums). They reduce the noise level by 22 decibels. They weren't as expensive as the adult versions you see in in-flight catalogs, either. They were around $30, including shipping.
They've already arrived, so I'll let you know how it goes!
Thursday, October 29, 2009
Album covers
This week, I've been backing up my photos and organizing my albums. I love albums with a spot for a photo on the front cover. For our Thanksgiving album, I didn't use a regular photo. Instead, I grabbed a Norman Rockwell painting, lowered the opacity, and topped with some wordart.
The result:
The result:
Labels:
Scrapbooking
Monday, October 26, 2009
Digital Page
The kids' birthday albums are officially up to date! Today I worked on my Mother's Day album.
Here's the page for 2008:
It's an 8x8 book, so I just printed it off and slipped it in a page protector!
Here's the page for 2008:
It's an 8x8 book, so I just printed it off and slipped it in a page protector!
Labels:
Scrapbooking
Back to Scrappin'
My daughter's second birthday had a little bird theme. I couldn't resist this paper. I put the photos together using a template, just as I had for her first birthday page. This time, I didn't like the white border, so I cut out all the pics and glued them back in position. The template ensured that the photos were sized and cut perfectly, so it was a breeze!
Labels:
Scrapbooking
Subscribe to:
Posts (Atom)